Sunchoke Relish or How I Learned to Love Sunchokes

049Happy 2017.  The year started with a bit of malaise and illness.  I was cooking, but I wasn’t much motivated to write about it.  Until now.

I love vegetables.

I hate sunchokes.

I keep trying to like them.  I don’t.

They have a funky taste I just haven’t been able to get into.

Friends make suggestions.  Try making them with soup with potatoes.

I did.  I ate one bowl.  Didn’t love it.  Ate a second bowl out of obligation.  Got rid of the rest.  And I hate food waste!

People have suggested frying like chips.  Too much work.

People have suggested grating and making into fritters.  Thought about it but never did it.

I just assumed this was going to have to be one vegetable that I couldn’t love.  Couldn’t  eat in any form.

I was wrong.

008One of my favorite shows is “A Chef’s Life” on PBS.  It follows the pursuits of Vivian Howard, a chef in North Carolina.  I like that she tries to cook seasonally, but I’m intrigued by what is seasonal in the south compared to what vegetables we have and when we have them in the Pacific northwest.  I’m looking forward to eventually getting her cookbook — partly because its production has been part of the show and partly because I’m curious to see more recipes, both hers and those of folks in her community.

010One on of the shows about sunchokes, she made a relish that comes from the family of Bill Smith who owns Crook’s Corner in Chapel Hill.  It’s not a recipe posted on the PBS website or searchable under Bill Smith, so I had to record it and watch it over and over to get the recipe.  Totally worth it!

It’s super easy.  I knew eventually we would get sunchokes in our share through the CSA.   Last Tuesday was finally the time they appeared.  Many folks left them behind in the share box and the recipe was based on 5 pounds of sunchokes, so I was able to score enough sunchokes to make the recipe from the unwanted vegetables from others.   I think like me, most folks aren’t fans.

Two important notes about sunchokes.  First, they are a beast to clean.  Our farmers do a great job of cleaning veggies for us, but even so, it took a bit of work to cut off bad spots and dig out dirt from all of the nooks and crannies of 5 pounds of sunchokes.  Second, sunchokes oxidize or rust very quickly when chopped or grated, so you have to be prepared for a lot of browned vegetables in the prep phase.  Fear not.  Once the sunchokes hit the vinegar, they turn bright white again.  Had I not heard that and expected it from the show, I might have worried my sunchokes were bad.

038On the show, Vivian and Bill have to hand grate the sunchokes.  If that had been my fate, I think I would have given up.  Instead, using my food processor, I made quick work of shredding the sunchokes.  I was impressed with myself and the speed with which I had them ready.  Still, if you don’t have a food processor, you could either slice thin on a mandolin or grate on a hand grater.  Good luck.

Now for the recipe.  It’s not canned, so you need to keep it cold in the fridge and make a plan to give it to friends and encourage them to eat it quickly (within weeks to a couple of months, probably).  Second, you need a really big pot.  I used my main dutch oven and then had to move up to a larger one halfway through the recipe.  The sunchokes take a lot of room until they cook down a bit, so you need a big pot.

To start, in a VERY LARGE pot, add the following ingredients:

  • 1 liter (about 4 cups) of apple cider vinegar
  • 2 c. sugar
  • 3 bay leaves
  • 2 t. salt
  • 2 T. turmeric
  • Thinly sliced onions — looked like 2 in the tv show, I used one since it was super large
  • Green pepper in chunks – looked like about 2 in the tv show, I used 2
039Heat it to a boil, and then lower to a simmer and cook until the sugar dissolves and the onions get a bit tender.  Remove from the heat.

Add into the mix:

  • the 5 pounds of shredded sunchokes
  • 2 ½ t. celery seed
  • 2 ½ t. mustard seeds
  • pimentos – I had no idea from the tv show on the amount, so I used two small jars since they didn’t seem very large

Stir everything together.  Return it to the heat, bring it back to a boil, reduce heat and simmer 10 minutes.  Sunchokes will add more liquid to the mixture as they cook.

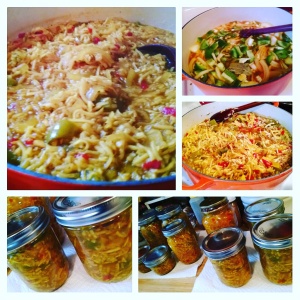
At this point, you just put the relish into jars and refrigerate.  I filled many, many jars so it makes a lot.  You definitely need to have people to give it to or a plan for eating it up.  It’s a good problem to have.

021If I were to make it again, the only change I’d make would be to add another 2 cups of vinegar to the mix.  As I was putting it into jars, I was wishing there was more liquid to cover the relish in the jars to prevent molding.  I did my best to make sure each of the jars had enough liquid but I did have to make some adjustments in my jars.

028

Many, many jars of relish — 3 quarts, 4 pints, 2 half pints!

Next time, I’ll make it  with a more “human” amount of sunchokes — maybe 2 pounds instead of 5 pounds.  I think I would proceed using the following amounts:

  • 3 cups apple cider vinegar
  • 1 c. sugar (maybe a bit more after tasting it after adding in sunchokes)
  • 2 bay leaves
  • 1 t. salt
  • 2 T. turmeric
  • 1 onion
  • 1-2 green peppers, depending on size
  • 2 pounds sunchokes
  • 1 t. celery seed + a smidge
  • 1 t. mustard seed + a smidge
  • 1 small jar pimentos

Otherwise, I’d use the same technique.  I think this would produce more than enough liquid and it would be flavored well.   It would make putting into jars easier in terms of liquid and relish.  The onion and green pepper are a nice complement to the sunchokes, so even if the proportions were higher,  I think it would still be delicious.040

I made it on a Sunday and let it cool a full 24 hours before tasting it.  My first bite still had that sunchoke flavor, so it wasn’t masked.  But it was better.   Not super vinegary and pickled like some recipes.  More subtle.  But better.

I had a leftover chicken-bacon sandwich that I planned to eat for lunch.  The relish was good with the chicken.  It was great with the bacon.  It was just yummy with the sandwich.

048On the tv show, they suggest the relish goes well with hamburger and beef.  Knowing I was going to make the relish, I thawed out some hamburger.  I made a simple hamburger patty and cooked it up with nothing more than some seasoned salt.  I ate it with some simple Japanese sticky rice and some sautéed vegetables.  I put a small little dollop next to the hamburger on the plate and started to eat.  The first bite of the hamburger alone was delicious.  On the second bite, I ate some beef with the relish.  AMAZING.  It was such a delicious combination.  Something about the earthy nature of the sunchoke in the flavorful relish with the salted and well caramelized beef was one of the best things I’ve eaten recently.  I kept adding more and more spoonfuls of the relish to my plate.  I brought leftover beef and relish to work for lunch today.  I ate almost a half pint jar’s worth of the relish with today’s lunch.  It’s just so good with beef.

And given how I feel about sunchokes, that was a bit of a miracle.

Thanks to Vivian Howard and Bill Smith.  And to everyone who left their sunchokes behind at the vegetable pick up.  Sunchoke relish.  Who knew?

Resolution Success: Yeast #12 or 13, depending how you count….

104Many years ago, I tried making cinnamon-cardamom rolls and killed the yeast.  You could say they were delicious because it’s a great recipe, but they were small, hard little things.  My friend, ever the loyal person, ate at least one.  I think I ate two, trying to convince myself they weren’t ruined.  We agreed they had a great flavor but were an unmitigated disaster in terms of yeast.

It was not the first time I had bad results with yeast.  The story I told myself after that experience, and weighed down by a few yeast failures, was that I couldn’t do yeast.  Ever.  I’m good in the kitchen in general so I was ok having that one thing that I just avoided, but I still found myself looking at recipes that included yeast and even printing them out now and again.  Somewhere I must have wanted to get better.  Still, I didn’t try again to see if I might have a different result.  Until a conversation a year ago about resolutions turned into an idea – make something with yeast every month in 2016 to try to get over my phobia.

083 085091 093

Here I am in December making my final yeast item – the same roll receipt from years ago.  I’ve had a good time with this challenge and I can say I am no longer phobic.  I’ve made mistakes along the way, but mostly it’s been a year of successes.  As I was starting the rolls, I was thinking to myself that no matter how the rolls turned out, it was fun to do the challenge.

101 108112 113115 117120 122124 125128 139

That said, I’m delighted to report they turned out.  Twelve months and13 yeast challenges (2 in November, because Thanksgiving….) finished!!

149Having made a variety of recipes this year and having made some mistakes, I can see now where I likely went awry with this sweet roll recipe.  It calls for both heated milk and melted butter.  I’m guessing now that my milk was likely fine but the butter was too hot and when mixed together, the mixture was much hotter than 105-110 degrees.  I have melted butter a hundred times in my microwave and over done it, so I’m sure I did it that time too.  This time I only melted the butter until about half of it was melted and the rest was soft.  When I added in my warm milk, I was sure to use a thermometer to check the temperature.  My 157mixture was just under 105 degrees, so I went ahead with the rest of the recipe because one of the things I’ve learned is a little too cold is better than too hot.

One of the questions I got was if I had a plan for what I would make each month.  Honestly, I really haven’t.  At the start of the year I chose low-yeast, slow-rise recipes because they started with cold or room temperature water so I knew I couldn’t kill the yeast.  They were recipes that took a long time, but I had great results and they felt like easy wins when I needed to win to keep going.

After a few months of those, my friend gave me a recipe that had so much yeast in it that it was pretty unlikely it could be killed.  Or some of it had to survive.  I was so impressed by that recipe, even though I kind of felt I had messed it up the first time, that I made it twice so it took up two months of my challenges.  To be honest, this may be one of my favorite bread recipes of them all.  It holds up well for several days and it makes really, really, really yummy toast.  In fact, I might be making some of this this weekend.  I’ve been thinking about it for a couple of weeks…

Mostly, I was motivated either by ingredients I wanted to eat (olives, cornmeal, cheese, figs) or ingredients I needed to use (buttermilk).  It was fun to explore different recipes and ingredients to see what was possible.  Most of the time, it wasn’t the yeast that was my problem.  High in the list of issues I had was not reading recipes all the way through.  In some cases, I didn’t have all of the ingredients to make a recipe I wanted to try, but I started anyway and then had to redirect myself and my recipe in the middle of the process.  Or I missed a comment about dividing ingredients – some in earlier, some in later.  In my defense, I will say that lots of internet recipes do not practice good recipe writing practice and you have to dig deep sometimes to figure out what you should be doing.  That said, the internet was invaluable in this quest for recipes, though I have become more discerning.

192

Rolls I made from frozen dough this morning — left in the oven overnight to thaw and “rise” and then baked this morning at 400 degrees for 15 minutes.

I did not intend for the sweet rolls of December to be the last recipe, partly because it seemed a cliché idea given my history.  I had intended to make these rolls back in October when I made the St. Louis Butter Cake, but I got derailed by two things:  my time, even on the weekends, was really limited so I needed something less fussy, less time consuming AND I happened to see Martha Stewart make the butter cake on tv.  It looked really delicious and I made it successfully, but I have to say I really did not love that recipe.  The first piece tasted good.  After that, it was just too gooey, too sweet, too much.  I will never make that recipe again and I don’t think I’d recommend it either.  Still, at the time, it was fun to make and it was certainly easier than making cinnamon rolls.

By November I knew I was going to do two challenges:  fig-walnut bread (because I was craving figs and a fig-infused roll from a Portland bakery I almost never get to go to because of distance had been in my mind for days and days) and bread rolls to take to Thanksgiving dinner at my parent’s house.

134Despite the cliché, I couldn’t fathom ending the year without making the “failure rolls” as part of the challenge.  Worse than making them my last challenge would have been never to have made them as part of the challenge.  Who wouldn’t want to exorcise a ghost of yeast failures past?  Since it didn’t 172happen in October or November, they had to appear in December.  I’m very glad I made them again and it felt good to see them fully risen and ready to bake.  Redemption!

180

Last night

183

This morning — not much difference

One challenge of this recipe is it makes 2 dozen rolls.  I did not have a large gathering planned so I took a tip from the recipe and froze most of the rolls once they were rolled up.  You put them on a baking sheet in the freezer and once frozen solid, you can easily put them in freezer bags.  I tested out two last night by putting them in muffin tins and leaving them in the oven overnight.  By this morning, they weren’t as puffed up as those I made immediately, but they baked up fine and were still delicious.  Now I have a little over a dozen left in the freezer for other mornings.

All this year, I often made my yeast stuff right before each month ended.  December was no exception.  Ever the procrastinator, it will be nice to move forward without a timeline and just “do yeast” when I feel like it.  It’s reassuring to move forward knowing that I will feel like it.  Maybe often.  Maybe soon.

Thanks to Angela for helping me put this resolution in motion!


BONUS YEAST: Amish Potato Rolls for Thanksgiving

119Having now made something with yeast 11 times this year, I was feeling a bit bold.  I decided to volunteer to make the rolls for the Thanksgiving feast.  I really was getting away with the easiest job since my poor mother agreed to make everything else!  It seemed like a good idea at the time but as the day got closer, I got nervous.  I pored over lots of roll recipes looking for hints about the ability to bake ahead and simply reheat on the day of the feast.  I knew my mom’s oven was not going to have enough room to take and bake the rolls at the actual dinner.

007I knew I had my winner when I found a recipe for Amish potato rolls.  They start with 1 cup of mashed potatoes and the recipe specifically stated that they could keep for several days.  Or freeze for longer.  It also helped my confidence to use a recipe that came off the King Arthur flour website so I knew it had likely been tested and would be reliable.

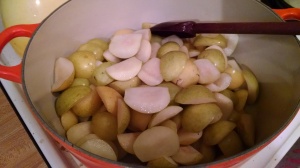
Once again, I got in my own way a bit.  I had a large white potato and a handful of 011yellow potatoes from the farm.  I set about boiling and mashing the potatoes the night before I was scheduled to make the rolls, but I was tired.  So I didn’t peel the potatoes.  I just made them like I always do, skins and all.  And when they were tender I poured off the water like always (the recipe suggests adding 3/4 c. water in which the potatoes had boiled, but I didn’t read that part until the next day…!) and mashed them, and then thought to myself, “uh oh.  I bet 014the peels will be a problem.”

Doh, as Homer Simpson would say.

When I started to make the bread, I spent the first little bit picking out potato skins from my mashed potatoes.  I ended up with a cup of potato that was MOSTLY clean, but you’ll notice in the pictures that there are still a few that got through.

Note to self:  start reading more closely before starting.019

I also didn’t have the reserved potato water but that was not such a tragedy.  Having it, however, probably would have added both starch and flavor.  Next time.  Maybe.

Otherwise, it’s a pretty simple recipe.  In a bowl, you mix all of the ingredients:

  • 1 c. mashed potatoes
  • 2 eggs
  • 1/3 c. sugar
  • 2 t. salt
  • 6 T softened butter (mine was almost melted)
  • 1 package yeast
  • 3/4 c. lukewarm water (since my butter was melted, I erred on the side of coolness in the water)

024Once this was combined, I mixed in 4 c. flour.  The recipe calls for 4 1/4 c. flour.  If I had been using my stand mixer, I would have just added in the full amount and let it go until a ball was formed in the mixing bowl after some “kneading” by the machine.  Since I was working by hand, I mixed in just under 4 cups of flour and then put the remaining flour on a surface and kneaded my shaggy blob into a relatively smooth ball and then put that in a bowl to rise for 2 hours.

I had worked later than I had hoped so by the time this went into a bowl for the FIRST 026rise, it was already after 7 p.m.  To try to speed things up just a little bit, I did a very quick preheat in the oven — just a few minutes — and then turned it off to keep some residual heat in the oven.  I covered the dough as directed with cling wrap and then let it do its thing.

076

Those little brown bits you see are potato peels I didn’t manage to fish out of the mashed potatoes…

In a little less than 2 hours, I was ready to go.  The dough has risen to the top of the bowl and I could at least know my yeast was doing its thing and hadn’t died.

I turned the ball out on to a piece of parchment paper and set to dividing up the ball into smaller roll sized pieces.   The recipe suggests cutting into 16 or 24 balls.  I did 16.  I assumed all 16 would fit into my 9 x 13 inch baking pan, but things looked pretty tight with just 12 so I put the remaining 4 in to a pie plate to bake separately.

079080081094

090

I tried to pick off any visible potato peel I saw on the surface of any roll before forming in the pan.

Again, now you’re supposed to let things rise for about 2 hours.  By now, it was getting late and I was afraid I’d be up until midnight at the rate I was going.  And it was Wednesday — the night before Thanksgiving.  I did another preheat for minutes in the oven, turned it off, and set my rising rolls into the oven.  In about 90 minutes, I was ready to bake.  I removed the rolls from the oven where they were resting/rising at 60 minutes and preheated the oven to 350 degrees during the last 30 minutes of rise time.

The recipe says to bake 20-25 minutes.  My bakes was closer to 22 minutes.  When they came out of the oven, I brushed the tops with melted butter.  They looked and smelled fantastic. Since I had the extra rolls in the pie plate, I immediately stuffed my face with a roll with melted butter and honey. HEAVEN!

098 120

I was supposed to let them cool completely and then wrap them for storage.  But it was already after 11 p.m.

I did a quick 30 minute cool of the oven — open the door fully to let all of the heat out as soon as possible and leave it open for a while — and then put the rolls on racks into the oven to finish cooling AND to keep them from tempting the cat.  I got in bed, set an alarm for 3 hours, and then when it went off, I 123got up, went to the kitchen, and put the rolls in parchment and aluminum foil to keep them from drying out and to make sure they were “oven ready” for reheating at my mom’s place.  Surprisingly, this task didn’t really wake me up and I fell back asleep at 3-something in the morning.

Other than being a bit sleepier than usual from the middle-of-the-night wrapping of the rolls, I felt pretty good about the finished product.  I had another roll for breakfast with some cherry jam.  The jam wasn’t great, but the roll was awesome.

128They reheated well at the actual dinner and I thought they were super tasty with just butter or with jam. I looked at the rolls selected by my parents to be on the lookout for random potato peels.  If anybody saw one, they didn’t say anything.

I would definitely make them again…but I’d remember to peel the potatoes.

☺


Yeast #11: Fig-Walnut No Knead Bread

027For challenge #11, I basically went back to the beginning.  It hadn’t really been my plan for this month.  I expected this month to be cinnamon rolls or some kind of formed yeast product.  But I started to get a craving for these delicious fig rolls that are sold at the Pearl Bakery in Portland, Oregon.  They have sweet fig and a crusty crust and I love them.  I didn’t realize until today that anise is the flavor in them that I adore.  I’ve always just remembered the fig, but now that I know it’s anise, it’s no surprise I love them.  I have a fondness for anise/fennel flavors.  I’ve been craving one of those rolls for a while so I decided I was going to have to make them myself.

Our local supermarket had a dried fig show up that I purchased for a party.  They 029turned out to be really delicious but they aren’t always easy to find.  I ended up having to order them via sources like Amazon.  It’s worth searching them out!

It’s not really sad, but I started this loaf yesterday with an internet recipe that called for cinnamon, not anise.  Had I thought to look up the bakery yesterday, I could have made that swap out.  Still, I knew cinnamon was not exactly what I wanted in the bread.  I wanted the sweetness of the figs, the nuttiness of toasted walnuts, and some kind of warm spice, but not a heavy cinnamon like a cinnamon roll.  So while I used the recipe I found to guide the amounts of fig and walnut to use, I used only a quarter of the cinnamon called for in the recipe.

Here are my amounts:

  • 3 cups all-purpose or bread flour — because of the amount of water called for and the humidity in our air from so much rain, I ended up using nearly 4 cups of flour in the first step
  • 1/4 teaspoon active dry yeast
  • 1 teaspoon salt
  • 1/2 cup chopped dried figs or raisins — I love figs so I used figs
  • 1/4-1/2 cup chopped walnuts, toasted if you like — I toasted
  • 1 1/2 cups plus 2 tablespoons water
  • 1/4 teaspoon cinnamon  — versus 1 teaspoon in the original recipe

It turned out my impulse was good, at least for me.  The cinnamon gave a warmth to the bread but it didn’t overpower the fruit or the nuts.  It smelled awesome once it was finally time to bake.

021But I’m getting ahead of myself.

One of the best parts of these kinds of recipes is that you can’t kill the yeast unless you 023have expired, old yeast.  You start with cold water straight from the tap, so there’s not a lot you can do wrong.  When I started this resolution almost a year ago, I needed a quick win and this gave me that win.

024In most of the recipes, they have you start by mixing in the dry ingredients, mix in the water, and then mix in your mix-in ingredients like olives, nuts, fruit, etc.  To me, there’s no possible logic for why that would necessarily be the case, and once the dough is wet and sticky, trying to incorporate the mix-in additions seems harder.  As a result, I do something contrary and always mix in my extras with the yeast/flour/salt mixture and then add the liquid to that mix.  I find my ingredients get distributed nicely that way with minimal work.

I think this recipe might have a mistake in the amount of liquid or it was just too humid on the day I made my dough.  I used the amount of water stated in the recipe and my dough was very, very wet.  Too wet.  It was resisting becoming a shaggy ball like it had with recipes from trusted sources like Jim Lahey.  I knew what I was going for based on my previous loaves, so I felt confident to add in more flour bit by bit until my shaggy dough pulled away from the sides and I no longer had a slick of liquid around the bowl.  Even so, things were still much stickier than previous times with this kind of recipe.  Once to my liking, it went to bed under some cling wrap for the next 18 or so hours.

On day 2 I was able to do the “kneading” process which with recipes like this simply involve putting down some flour, plopping the sticky mess on it, and folding the dough a few times to incorporate flour.  No kneading.  Just a little folding.  This dough was sticky, still, and it was some work to get it out of the bowl.  As a result, before putting in a new bowl for the final rise (2-3 hours after the folding and forming into a ball), I made sure to spray the bowl with oil to keep the final loaf from sticking.005 006 007 008

When I got home from work, all I had to do then was heat up the oven and my dutch oven at the same time to 450 degrees.  Once hot, in goes the dough, covered, in the hot dutch oven for 30 minutes.  My loaf was already pretty brown, so once I uncovered it, I only baked my loaf another 8 minutes.  The recipe suggests 10 – 20, but you have to keep an eye on it for your conditions.

img_20161116_202354140I let it cool for a while but to be honest it was very hard to resist eating it right away.  I did cut off a hunk while it was still warm.  DELICIOUS.  Of all of my yeast projects, this is my favorite.  It’s not totally the same as the rolls I was craving from the Portland Bakery, but it has the same figgy/nutty flavor in the soft bread center and the crusty/crunchy crusty on the outside.

img_20161117_074229229_hdr

img_20161117_075031491_hdr

This morning I cut off two slices.  Once got made into toast.  The other got made into a grilled cheese sandwich under the broiler with a smoked cheese called “Campfire.”  Both were delicious.  The toast had a lovely combination of flavors — sweet fig, crunchy crust and nuts, delicious butter.  It was really lovely.  The sandwich, however, was a dream.  The crust got extra crunchy and and browning of the sandwich deepened the flavors in the bread.  The sweet figs with the smoked cheese and nuts were a really great combination.

Even though it wasn’t what I had intended to make this month, it’s a total winner.  I am sure I’ll be making this again soon.

Yay yeast, but especially yay to figs and walnuts!


Super Easy Crock-Pot Chicken Stock

049I’m actually surprised this hasn’t already been part of this blog.  Or maybe it has and I’ve just forgotten and can’t find it.

I sometimes watch The Chew — sick days, sometimes on vacation, and I’ll tape it a bit in the summer when there’s not much else on tv to watch.  On one of the episodes I caught in the past year, Clinton Kelly was talking about making stock in the crock-pot.  In his description, it was super easy since you didn’t have to tend it.  Among the other hosts, they also reasoned that it might not be as cloudy as the stock made on the stove since it would stay mostly below a boil since you’re cooking it on low heat.

235I always feel like I’m under utilizing my crock-pot so I was eager to use it for this purpose.  I tried this for the first time last year after Thanksgiving.  My mom sent me home with the turkey carcass for stock making which is something I like to do and she doesn’t (or usually doesn’t do).  Once I got home, I broke it down to make it fit in the crock-pot better and then added in the basics: onion, carrot, celery, bay leaf and pepper corns.  Probably also garlic.  I had fennel so I added in one bulb of that also cut in half.  You barely have to chop since large pieces are the goal.  It takes minutes to get going and once the crock-pot is full, you cover it to the top with water, put on the lid, and you’re in business.

236You then put it on low for 8 hours, go to bed, and when you wake up in the morning, you have delicious turkey stock ready to be strained and stored (freezer, for me).  It helps if you have a digital crock-pot that automatically goes from cooking to just keeping things warm automatically or you’d have to time your wake up call to the finishing time of the stock.  The only bad thing is that it was a little intense to be pulling out solids and straining liquid as my first-thing-in-the-morning activity, but the house smelled AMAZING and I had really clear, beautiful and flavorful stock.

And given that most people simply throw the turkey bones and the little bits of meat away, it’s like having a nearly free resource.

I’m always in a war with myself about wasting food. It drives me nuts and the worst offender has been my freezer (followed closely by my pantry).  As a recovering freezer abuser (which means out of sight, out of mind and forgotten), I now very compulsively work to keep my freezer under control.  I no longer put super perishable things like frozen berries down in the basement freezer to die of freezer burn and neglect.  That freezer is now only for meat, jars of stock or sauce, and things that last a long time like big bags of nuts, dried fruit, or chocolate chips.  If it’s not one of those, it stays upstairs, but even that freezer was getting out of hand recently. Even though I’m in it every single day to at least get ice, I had lots of “I have no idea what is in here” moments.  I knew sometimes things were in there but it was too hard to find them amidst the stacking and pushing of items.  Invariably, I’d be looking for A and find precious item B and think, how long has that been in there?  Is that from this summer or last summer’s bounty?

The one good thing going for me is I’m not anti leftovers.  I will happily eat the same thing over and over again to make sure it doesn’t go to waste and finding a portion of something later in the freezer does make me happy.  Beyond that, it was chaos.

I was in Portland for an event so I made a quick stop at an organization store and found some clear plastic containers to create “drawers” in your refrigerator freezer.  One has only one “drawer” and and the other has two drawers with a divider in the middle.  They barely fit in my tiny freezer but they made a huge difference.  I’ve got them side by side and there’s just the smallest bit of space between them which has been a good location for stashing extra boxes of butter, chocolate chips, or similarly thin items.  It was revolutionary.

First, I had to take everything out to start.  There were some humiliating moments as I had to throw out some lovely items that were long, long, long past being any good.  I feel it’s a terrible waste of my money and someone’s time when I have to get rid of meat, fish, or anything else I know I valued at the time…

Second, this gave me the chance to put things that aren’t perishable — like those cold blocks and ice packs that go into coolers and were floating all over my freezer — in one place at the back of the freezer.  Why were they given prime real estate over something like Italian sausage that was now very freezer burned and crusty looking?  Or parts of a turkey I spatchcocked years ago and had hoped to turn into stock but now were so old and freezer burned that they had to be throw out?  Or what was probably a really lovely little piece of smoked fish that was probably several years old and almost petrified?  Finally all of those little suckers are in the back.  Some are in strange spaces that now exist in the back of the freezer where the drawer doesn’t touch the back wall.  Perfect.

In the divided container I organized all of the miscellaneous bags of frozen vegetables, things I had frozen in ziploc bags, and little containers of things like frozen pot stickers.  Partially used bags of nuts went in.  Everything was super orderly and now I can see what’s in the back by simply pulling out the drawer.  I don’t have to dig around like before.  Genius — not mine!

In the single drawer I put in jars of things that didn’t fit in the door — broth, bit of soups I’ve made, juiced cucumbers from the summer bounty for making mixed drinks, corn flour, etc.  All the little quart and pint jars look neat and tidy and I can see everything by simply pulling out the drawer.

Now don’t get me wrong.  I’m still piling miscellaneous things on top of the drawers of stuff, but now there’s no risk it’ll push something else valuable to a place I can’t see it.  Thin things like bags of frozen basil and other delicate herbs can now rest on top of my jar drawer so they get used quickly.  Little partial bags of frozen pasta can go in that odd space in between so I see them every time I open the door.  Everything is viewable at any time simply by taking off the few things on top and then pulling out the whole plastic drawer to see what’s there.  I’m less apt to buy yet another bag of frozen corn when I can see that I already have two partially used bags happily waiting for me.

094When I was taking everything out I found some odd chicken back pieces and the necks from two chickens I bought this summer for the purposes of a fried chicken and onion ring party.  I remembered thinking I’d save them for stock making.  Finding them again during the clean out process got me motivated to make another batch of crock-pot stock.  It doesn’t take a lot of meat to make a chicken stock.

I went ahead and put the frozen chicken bits into the refrigerator to thaw out and then the next day I put together my stock components.

The genius of this recipe is you can use whatever you have.  If you had bones from a rotisserie chicken or two, you could use that.  If you had leftover pork bones or bits you could use that.  Random parts work.  Or you could go out and buy a turkey leg or wing or some chicken wings just for the purposes of making stock.

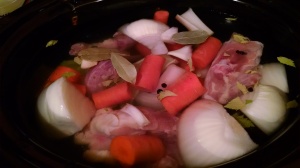
Because it’s what I had on hand, here was my ‘no recipe’ recipe:040

  • Two chicken backs and two necks (from whole chickens the butcher had chopped into parts for my frying.  The backs were too bony to think about frying since they’d have been a nightmare to eat and nobody I knew said anything about wanting necks).
  • One large onion (mine happened to be sweet and organic), chopped into 4-8 parts depending on size.
  • Three carrots, chopped into 2-3 pieces each (mine happened to be organic so I didn’t peel but I did cut off the stem end).  You only have one carrot? Fine.  Nobody says you have to have 3, but it’s what I had and I used them.
  • 4 stalks of celery, including leaves (not organic since the organic stuff didn’t have the leaves and I like the extra flavor leaves add to stock and soups in general).  Again, how much is up to you.  Don’t like celery? Leave it out.
  • 3 cloves of garlic — just because three came off when I tried to remove one clove
  • A smattering (maybe a teaspoon or so) of whole black peppercorns
  • Bay leaves — 3 small because they all came out when I meant to pull out one, but since they were small, I went with it.042
  • Enough cold water to cover everything

I do remember waking up in the middle of the night to the smell of the broth.  I went back to sleep quickly, but there’s nothing bad about that smell filling your house.  By morning, the mixture was a brown, roast-y color.  Everything is cooked, mellow, and spent with all of its flavor going into the stock.

048It takes a little bit of work to pull out and drain all of the solids.  I usually use a combination of a 4-cup measuring cup and my small pasta colander.  I fill it will ladle after ladle of stock and solids and when the measuring cup is nearly full, I let the solids sit in the colander for a few seconds to keep draining.  I then fill quart and pint jars as I go.  The solids get discarded.  After cooking all night, there’s very little flavor or texture left in the meat or vegetables so 051there’s not a lot of reason to try to salvage them for eating.

At that point you have to decide what to do with it all.  If I were hosting for Thanksgiving, I’d probably have kept them upstairs for almost immediate use.  Most of what I produced (nearly 4 quarts) I put into the freezer — some upstairs and some downstairs for use over the next months.

050

Click on photo to enlarge.

After cleaning out the freezer, I did want to make a pasta dish my Japanese neighbor Atsuko used to make.  She had a magazine with Italian recipes and two of them were especially popular with us and I often still make them.  In some ways, they make me feel better when I’m missing her or missing Japan.

The concept is simple.  You brown bacon in a hot pan and then add in vegetables.  Because I had it, I used various small sweet peppers, zucchini, onion, and shallot (not much of each item, but a lot of variety).  Once a little soft, you deglaze the pan with white wine to get the brown bits off the bottom and then add about equal parts of chicken stock/broth and canned tomatoes.  I had my own tomato/pepper sauce in the freezer so I defrosted it and then used some of my new chicken stock as well.  Once the 044vegetables are nearly tender, you throw in pasta (I used elbow macaroni) and a little bit of kale (I only had 3 “leaves” or stalks). Plus salt and pepper and because I like it, dried thyme and oregano.  Once the macaroni has cooked, you serve with Parmesan cheese.

The flavors are a bit similar to minestrone.  It’s not quite soup, but it does result in a soup-y pasta.  It’s very satisfying, especially since it cleaned out my veggie bins, used up a jar of frozen tomato sauce, and used some of my new stock.  Another bonus: only dirties one pot! Small victories!!


Yeast #10: Gooey Butter Cake

116When I started this yeast resolution almost a year ago, I have to admit I had a lot of trepidation.  I knew I could try it — fear of cooking is not my issue.  I just didn’t expect things to go so well.  There have been some mishaps along the way — all caused by me — but when they happened, I knew enough either about yeast by then or cooking in general to keep moving.  When the worst test came up and everything went wrong and it still turned out ok, I knew I was going to be fine.  At that point, I should have decided “I win” and just stopped.  That was July.

I didn’t stop.  I kept going and things have still been turning out well.  I have learned enough to know when to push things and when to hold back.  And I have to say I feel really no fear when it comes to working with yeast.  So in that respect, it’s been an unmitigated success.

Now, though, in the final stretch for the year, it’s feeling a bit like a burden.  I still like doing the projects, but sometimes trying to hit the task before the month ends can be a bit tricky.  I’ve been trying for a couple of weekends to do the yeast project for October but it kept getting shifted.  Finally this weekend it was do it or miss the goal, so I got into the kitchen.  I won’t miss the influence of the calendar once the year ends.  I look forward to doing these projects when I want to and not feeling like I have to do them.  Of course I know the only rule maker is me so I could stop, but I’m so close now.  Why stop now?

One of my friends and I were talking and she assumed I had mapped out the full year.  I hadn’t and still haven’t.  I knew that at least one month would be the cinnamon rolls I tried to make years ago that failed horribly, but I had no idea what month they would appear.  I had decided to make them this month until something else caught my eye.  For every month, I gathered some of the recipes I had saved from over the years and looked to see what might be good.  Initially I was looking for no-fail recipes to give myself a boost.  Then I was looking for things where yeast — and not killing it — would be a bit more challenging.  Once I could make bread, I wanted to try making things with ingredients I like like olives, buttermilk, corn meal and cheese.  All along I’ve been following whims or taking suggestions from friends.  I only repeated a recipe once so far, but that was mostly so my parents to could taste a loaf I thought was especially good.

This month I was looking at the cinnamon roll recipe I thought I’d be making — the one with which I had previously failed.  I was also watching an episode of Martha Bakes at the same time and she made a recipe for a St. Louise butter cake.  I was intrigued by the look of it.  On the bottom was a slightly sweet yeast dough and it was covered on top by some butter-filled concoction.  As the two layers baked together, some kind of alchemy occurred to create the final product.

051

My mom’s kuga based off of the kuga her mom used to make. This is what I thought this cake might be similar to, but I was wrong…

I was intrigued.  I was thinking it might be similar to the kuga (coffee cake) my grandmother made and my mom now makes.  I was not exactly correct in that assumption.

It looked to be a much easier recipe than the cinnamon rolls since no rolling or slicing was involved and the rise time was just one hour and the back time was 20 minutes.  Since I wanted to make it on a Sunday I also hoped to make lasagna, it had the ‘quick’ finish time I was looking for so I set out to make it.

This recipe calls for 3 sticks of room temperature butter.  I always have butter in my house, but usually it’s in the freezer.  By the time I knew this was my recipe, it was still in the freezer, so it was just easier to run out and buy a new pound of butter so at least it would be refrigerator temperature.

094 095

For the dough, I pushed it by warming the first stick of butter slightly in the microwave.   I probably took it a little too far because I wanted soft but what I had was partially melted.  I then overheated my milk by a smidge as well.  I put the milk in the freezer to cool it down and mixed into my melty/soft butter most of the other ingredients:

  • 1/2 cup (1 stick) unsalted butter, room temperature
  • 1/4 cup granulated sugar
  • 1 teaspoon coarse salt
  • 2 large eggs
  • 1 cup all-purpose flour – recipe calls for 2, but this is where I started

Because the butter was really soft, it was a breeze to mix in the sugar, salt, eggs, and 1 cup of flour.  Because Martha had made a point of mixing the yeast/milk mixture in with the flour, I didn’t want to completely move away from her instructions in case they might be meaningful.

096 098

Once my milk had cooled to about 100 degrees, I mixed in the one packet of yeast.

  • 1/4 cup warm whole milk
  • 1 envelope active dry yeast

After letting is sit for a few minutes to begin to develop, I mixed it in with the last of the flour.

  • 1 cups all-purpose flour

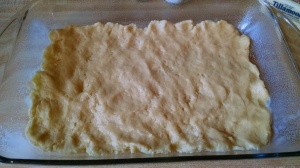
100It came together as a very soft dough ball that was very easy to spread into a greased 9×11 inch pan.  All that was left at that point was to cover it with wrap and put it in a warm location for an hour.  I had briefly (minutes!) heated my oven to make it a bit warm.  I put the pan of dough and a bowl with my other two sticks of butter into the oven to rise and to bring the butter to room temperature.

105 107

When the dough had been rising for nearly an hour — it gets very yeasty smelling and a nice lumpy top appears — I got to making the topping.  The topping is like a combination of buttercream frosting and sugar cookie dough.  It didn’t exactly turn out the way I expected.  I thought it would be more liquid and similar to what tops my grandmother’s kuga.  Instead, it’s a butter/sugar bonanza that you “frost” on to the yeast dough base.

Using my hand mixture (easier than digging out my stand mixer), I blended the topping ingredients:

  • 1 cup (2 sticks) unsalted butter, room temperature
  • 1 1/3 cups granulated sugar
  • 3/4 teaspoon coarse salt
  • 1 large egg, plus 1 large yolk
  • 1 tablespoon pure vanilla extract
  • 1 1/3 cups all-purpose flour
  • 1/4 cup light corn syrup

108 111

I started with the sugar and butter and salt and creamed like making cookies.  I then added in the egg and extra yolk, the vanilla extract, and the corn syrup.  Finally I mixed in the flour.  It was very much like frosting/cookie dough at this stage.

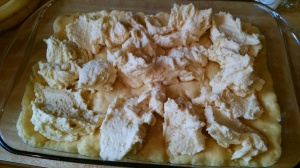
The key is getting it spread on the dough without deflating the dough.  It helps to make some strategic “blobs” of the topping all over the surface of the dough.  Once mostly spread around, you then gently spread the topping evenly over the top.  If you have an offset spatula, I’m sure that works best.  I just used a kitchen knife and took my time not to push down too hard.  The one mistake I might have made was pushing the topping all the way to the edges.  If I made it again, I’d leave a small border around the edge to allow the bottom layer to puff up more on the edges.

113 114

The amazing thing is that the recipe then just takes a quick 20 minutes or so in the oven at 350 degrees.  I cooked mine a few minutes more but I think that’s because I couldn’t gauge the browning since my edges were under the topping.  I probably could have stopped at 20 minutes.119

Here’s the key:  let it cool completely to room temperature.  I didn’t, and it was an oozing mess.  A couple of the pieces I couldn’t have served to anybody but myself from the looks of them and I scooped them into a bowl to try to help them from oozing any more than they already had.  Once cooled, the gooey stop still stays gooey but it doesn’t run off of the base.

128That mistake aside, it is delicious but it’s super, super, SUPER rich.  For me, one piece was about as much of it as I wanted to eat.  Best to make it when you have friends who can help you finish it.  I did give some away and I’ve made myself work through another piece of it, but it’s so sweet.  Even with a cup of dark, black coffee, it’s pretty intense.

If I were to make it again, I’d probably reduce the topping by half.  I really liked the flavors of the yeast dough base and the topping is good, but it’s just too much of a good thing for me.

Still, the yeast developed without a hitch, so that’s a win for me!  Yeast attempt #10 is a success.


Asian Pears-a-pa-looza

042One of the amazing gifts of being connected to farmers and having them become your friends is that unexpected bounties can come your way.  I am often the beneficiary of generous surpluses of things and I am always grateful.  This year I was the lucky receiver of beautiful pears that became vanilla pear butter, maple pear butter, and some delicious pear cider that I greedily drank all by myself.  Happily, some of the pears went back to my industrious friends as little jars of jam wonderfulness.

More recently, I was given many, many pounds of Asian pears.  The largest of them got eaten straight — peeled, cored like an apple, and eaten with delicious abandon.  Asian 068pears are crisp like an apple but have a watery pear-ness that is sweet but not too sweet.  I’ve never really done anything with them other than peel, core, and eat them raw.  It’s how I was introduced to them years ago and how I ate them in Japan.

I turned to the internet.  I did find recipes for canning them as jam, so I did make a couple of batches.  Unlike what I was seeing online, I did not peel them or grate them — too much work.  I figured that the skins would eventually get tender enough to puree into jam.  Because I wasn’t sure how it would go, I made the first batch as simply as possible:

  • 5 pounds washed, cored, and chopped pears
  • 4 c. sugar
  • juice of 2 lemons
  • 1/4 cup bottled lemon juice (just to be safe)

Yes, it’s a lot of sugar.  The sugar and the lemon is what keeps things safe.  It can sometimes be unpredictable to use fresh lemon so I used some of the bottled stuff for it’s reliable acidity.

026 027

030 034

It takes a long time.  I was getting very impatient but the final fruit had to simmer on the stove for about 40 minutes.  Even then, it was hard to get the immersion blender to process things down.  I learned the hard way that you need to keep stirring the mixture.  My first few filled jars were a bit watery as the thicker jam was settling on the bottom of the pot.  Once I realized, I did a better job of stirring things up to normalize my jars.  The first thin ones will be syrup for pancakes and the like.

037 039

The plain jam was good.  There was a bit of bitterness from the skin, but it didn’t bother me.  It did get me thinking about flavorings.  The main one found on the internet was ginger.  I’m sure that’s good.  I decided to go another direction and use whole cinnamon sticks and star anise.  I love the star anise flavor in fruit compotes I’ve made in the past and I thought it’s strong flavor along with a flavorful honey as part of my sweetener would be a dynamite combination.018

A few days later, I started with the same basic recipe but added 2 full cinnamon sticks, 3 star anise, and a couple big spoonfuls of olive honey that I have because it’s very strongly flavored.  I knew in advance it needed to cook a long time so I just started up front with the timer set for 45 020minutes.

The aroma was very beguiling.  I was getting hungry so I pulled out some cheese and crackers for a snack.  As I was getting my small feast ready, I thought “why not put some of the softened pears on top?  I bet that would be good.”  It was fantastic.041

I greedily ate the first three and then made myself three more!

I proceeded to make the rest into jam as planned — pulling out the spices and then using the immersion blender to puree it into jam.  I then canned it as usual.

I still had quite a few Asian pears left and the cheese snack helped me to decide that instead of making yet one more batch of jam, I’d just make canned Asian pears using the same flavor profile as my jam.  If I didn’t can them for a long shelf life, I could use less sugar and just plan to eat them sooner rather than later.

066A few more days later and I set to the kitchen to make my concoction.  I washed, cored, and chopped the pears into fourths.  In a pot, I added whole cinnamon sticks, star anise, more of the honey, and a bit of water to get things going.  Once the pears were tender, I put them and the accumulated liquid into two large jars and one small jar.  The little jar went to the farmers.  I ate the first big jar in just a few days — by themselves like fruit cocktail, mixed in with plain yogurt, and even a few on cheese and crackers.  The second jar got eaten more slowly.  These pears were made in late 067September but I’m still finishing up the jar in mid-October.  There’s enough sugar and lemon to make them stable for a bit longer even though they’re not canned and processed.

It was a lucky bounty and it sent me in some new and fun directions in the kitchen.  Thanks friends!!


Yeast #9: Raisin Rolls

066This month’s yeast challenge was a craving for sweet Japanese raisin rolls.  I’ve been craving a lot of Japanese food lately.  I did a google search on Japanese recipes but they looked a little too complicated for the actual time I had to devote to the project.  Maybe another month.  August and September are too crazy for too much extra time and energy in the kitchen, even for someone like me who finds kitchen time relaxing and usually energizing.

I found a recipe for Dutch raisin buns or krentenbollen that seemed pretty simple and only made 12 buns.  I decided the ease and reasonable production amount made the decision for me.  The only challenge, at the outset, was that the recipe gives all measurements in grams which is challenging in our U.S.-centric measurement lives.  Happily, I bought an electronic scale a few years ago.   I mostly needed it for weighing fruit for jam recipes, but it has lots of measurement options and it’s surprising how often I reach for it.

I also decided to do three things “wrong” at the outset.  I was not going to make the sugar/orange-lemon zest “sweetener.”  Instead, I decided to put in the sugar as noted and just stir in some lemon and orange zest “by eye” or when I felt I had enough.  I also decided not to wait to “pinch” in all of the raisins (so many raisins!) after making the dough.  Who has time to pinch in that many raisins and make sure they incorporate?  No, I intended to start right away with the raisins in the dry ingredients and go from there and see what happened — devil may care, so to speak.  Third, I did not intend to wash, dry, and wait 2 days with the raisins.  Nobody has time for that.  Not me, at least not now.

022Given how badly things can go, it was a bit ironic that I would decide to do these things against the advice of the recipe writer.  I felt confident, though, that I have had enough experience with yeast products now that I might be able to get away with my choices to do something different.

I also decided not to start with cold milk even though the recipe didn’t say anything about heating it.  The recipe called for butter and the easiest way to incorporate it evenly was to melt in in the milk.  Given the worst experience I’ve had so far with a boil over on the stove that went into the oven, I decided to use the microwave and heat in small increments. I heated it until the butter was 3/4 melted and then just let it stand.  Eventually the butter was all melted from the residual heat but I didn’t have to worry about the mixture being too warm and killing the yeast.  I just wanted the yeast action to go faster, so heating was the only way to push that along.  It was already mid-afternoon and the time to rise was listed as 1 to 1.5 hours and my experience last month showed me that with cold milk, it was usually longer than that.

025 032

So I set into my kitchen with my ingredients and my kitchen scale in hand.  You start with the dry ingredients.  The recipe is written as follows:

  • 400 g bread flour / all purpose flour / French type 55 flour
  • 40 g fresh yeast or 14 grams instant yeast
  • 8 g salt
  • 50 g fresh dairy butter
  • 1 egg yolk
  • 220 g milk — starting with 170 grams and adding more as needed up to 220 grams
  • 10 g sweetener (sugar and lemon/orange zest mix)
  • 400 g raisins, washed and soaked (you can also use a mixture of raisins and currants)

In my empty bowl, I added approximately the following amounts (I did weigh them to get the amounts in the recipe, but these are approximately what you’d add if you don’t have a scale though be prepared for things to be a bit wonky):

  • just under 2 3/4 c. all purpose flour (I used unbleached white flour)
  • 2 packages instant yeast
  • just under 1 1/2 t. salt
  • 400 grams raisins (a Trader Joe’s bag of “Jumbo raisin medley” has 454 grams noted on the bag, so I could have approximated had I not had the scale)
  • just under 1/4 c. sugar
  • lemon and orange zest, by eye, to delight only myself

In a separate bowl, I added:

  • 50 grams melted butter (basically half of one stick, based on the grams weight listed on the wrapper)
  • about 3/4 c. whole milk
  • 1 egg yolk — I used a whole egg

Since you don’t start with the full amount of milk, I figured the egg white from the whole egg could offset some of the moisture from milk.  I tempered the egg by adding just a little bit of the heated milk/butter mixture and stirred briskly.  I added a bit more and then finally all of the milk/butter mixture.  By tempering in this way, you don’t get cooked egg.

028 029

The dry ingredients were a breeze to pull together and the wet ingredients went in to create a shaggy dough.  At first I thought my dough was too dry.  the difference between 170 grams of milk and 220 grams of milk was about 1/3 cup of milk.  I ended up adding in about half of it (1/6 c. milk), but then I felt my dough was too sticky.  I let it rest a few minutes, and then worked in almost 1/4 c. of flour (maybe 3/4 of it).  By then my dough was pulling away from the sides of the bowl and was moist but not so sticky.  It then easily went into a greased bowl for the first rise of 20 minutes.

035 037

My impulse to heat the milk was on point.  This rise worked very well.  After 20 minutes you’re to turn it out, form it into a rectangle, roll it into a tight roll, and let it rest another 20 minutes.  I did this on an unfloured cutting board to keep things tender.

043 047

At the end of the 20 minutes, I took a knife and cut the “log” into 2 halves and each half into halves.  That gave me relatively equal 1/4 pieces.  I then formed each 1/4 piece 049into a relatively even looking rectangle and then by eye cut that into 3 pieces.  By the time I was done, I had about 12 equal sized pieces. The original recipe writer weighs her rolls to make sure they’re equal.  I didn’t worry about that, thinking I’d put the larger ones on the outside of the pan and any smaller ones toward the center where they wouldn’t burn.  I then rolled them gently into balls and placed them on a baking sheet lined with parchment paper to discourage 050sticking.

I had preheated the oven for just a few minutes at the start of the second rise.  That meant my oven was just slightly, slightly warm, but warmer than my kitchen on a rainy Sunday afternoon.   I pressed each ball down slightly to give them a flat top and then put the whole pan into the warm-ish oven.  Rather than having to wait at this stage for 60-90 minutes, I was ready to go in 30.  I felt pretty good, I have to admit.058

I took the rolls out of the oven and then set the oven to preheat to 390 degrees.  By the time the oven was warm enough, the rolls were nicely risen and ready to go.  They got a bit bigger and fuller as they baked in the oven and they came out a lovely shade of brown in about 15 minutes.  In your oven, it might take 20.

060I brushed the outside with melted butter.  I meant to wait, but I couldn’t resist.  I ate one hot from the oven with just butter inside.  It’s sweet, but not overly so.  There’s not much sugar so the sweetness comes from the citrus and the raisins.  It’s an awful lot of raisins.  You could make it a sweet roll by drizzing a glaze on the top, but I liked the simplicity of it — yeasty, sweet, lots of raisins, and a pretty satisfying little treat.

064 070

It’s more bread than one person can eat so I packaged most of them in groups of two for the freezer and eating later.  I’ll be eager to see how well they thaw.  I did eat one for breakfast that was really soft and great.  I have one more for tomorrow to see how they are two days out from baking.

I have no idea if they are authentic krentenbollen, but they are a tasty raisin roll.


Giving in to cravings

050Even though I lived in Japan for three years, it sometimes seems odd to me that I don’t crave Japanese food more often than I actually do.  I can go a long time without wanting it or making it, but then there will be a trigger and that’s all I can think of for days.

It usually happens around movies.  When my little art house cinema shows a Japanese movie, if they show them eating anything, I usually leave the theatre obsessed with something either in the movie or suggested by the movie.  It happened on a plane once, but luckily it was on the way to Japan so I had a lot of time to indulge my cravings.

Last weekend I went to see the film “Our Little Sister.”   In it, three mostly adult daughters attend the funeral of their father who left their mother years ago and began a family with another woman which resulted in a daughter.  At the time of the movie, he has now been with a third woman and the daughter of the second woman is kind of left in limbo.  The older daughters invite her to come live with them, even though it’s a bit scandalous given she’s the product of a union that ended the marriage of their parents.

It’s a lovely film in tone and it’s worth seeking out or renting.  Along the way, they eat a variety of things but the one that caught my eye and my hunger was tempura and cold buckwheat noodles in the summer.

Ironically, I had a plan to make chili but chili was the last thing I wanted to eat.  But I needed to make chili because I had the stuff and didn’t want the vegetables to go to waste.  So, I did intend to still make chili.  But first I would make tempura to satisfy myself.

039I filled a small pot with oil, added in a thermometer and set to heating it to 350 degrees.  It always takes longer than I think it should.040

In my refrigerator I had small eggplants (a little bigger than Japanese eggplant but still small enough to work), red sweet peppers (small), and broccoli.  I decided I could make myself a nice appetizer from what I had.

My basic batter:

  • 1 c. flour
  • 1 egg
  • 1 cup liquid (1/2 cold water, 1/2 vodka)
  • a generous pinch of salt

042I had read once that vodka evaporates faster than water so it can be used effectively in pie crust.  I decided to give it a try in my tempura batter with the hopes it would make my batter lighter and less heavy in the coating.

I mixed this together and it was still pretty thick.  I then keep adding more water until I have a batter the consistency of thin pancake batter.  It was probably almost another 1/2 cup by the time I was done.

041I got impatient and started cooking too early when the oil wasn’t hot enough.  Sadly, as I knew it would, it makes for an oily result. You need hot oil to keep the food from absorbing too much oil and for making the tempura coating light and crunchy.  Sadly, I wasted some broccoli with my impatience.

Finally, the oil was hot enough.  I was happily cooking the broccoli and the peppers.  As044 they came out of the oil, I added a bit more salt.  For the eggplant, I kept the top on it to hold it together, but I cut it into strips and then cut across those strips to create what looks like “fingers” or the tentacles of an octopus.  I dipped it into my batter and pushed the fingers apart and then added it to the oil.  The hot oil helps it to open up and cook evenly and when it comes out it’s lovely and dramatic.

I had a little cold buckwheat noodle dipping sauce in the fridge for an Asian market so rather than making a dipping sauce, I used that as my cheat.  It was a lovey little appetizer and satiated my immediate craving.  I did make my chili, but most of it went into the freezer for eating on another day.

075Later in the week, I still had a craving for Japanese food.  Because I had a couple of weeks of carrots and potatoes from the farm, I decided to make a big pot of Japanese curry.  The traditional way is pork or chicken and then a combination of onion, potato, and carrot.  I had onion, potato, carrot, sweet red peppers, and eggplant and I had intention to use them all with just a little pork.

I always take the short cut of Japanese roux sold at the store.  Each box is diluted with 2.5 cups of water so depending on how much stuff you want to use, you either need one or two boxes.  I typically have more vegetables than one box can handle so I always get two boxes so I can assume 5 cups of water which is plenty of room for all of the vegetables I want to use.  The technique is easy:  cook your meat and onion cut into chunks, add in your vegetables of choice and the water and cook until your vegetables are nearly tender.  At that point you add in the roux and cook it another 5-10 minutes or so until it gets a bit thickened and stew-like.073

I always put in too many carrots, especially, since that’s my favorite part of the curry — sweet curry and big slices or chunks of sweet, flavorful carrot.

Although not traditional in terms of my vegetable combination and the fact that I served it with brown rice instead of sticky white rice, I loved it.  It felt good going into autumn with THE Japanese comfort food.

For now my cravings are satisfied.

Yeast #8: Easy no-knead cheese bread

057In January, I committed to making something with yeast every month to get over my phobia of yeast.  This month’s yeast adventure is very much “of” this month.  August is one of the craziest work months for me and I spend most of the month spinning.  As noted elsewhere, I am still cooking as much as I can, but it’s more for survival and to stay away from scary fast foods.  There’s almost no time to do any writing about food or cooking.

Enter this month’s yeast recipe:  no-knead cheese bread.  A couple of months ago I had alluded to wanting to make bread with cornmeal and with cheese.  Last month was the cornmeal which turned out to be harder than it had to be due to my own issues.  This month was the cheese.  The best part of this month’s recipe is that it was the easiest and least time consuming yeast recipe so far.

010009

The only thing that took a little planning was chopping up and cooking 1/2 cup finely minced onion and 3-4 cloves of minced garlic.  Once tender, you set it aside to cool while you do the rest of the prep.

The whole mess basically mixes up like a quick bread — no heating of the liquid, no proofing of the yeast.  In a big bowl, you mix the dry ingredients.

  • 3 cups of flour
  • 1 package of instant yeast
  • 1 1/2 teaspoons of salt
  • 2 c. shredded or diced cheddar, provolone or swiss cheese (I used bagged, pre-shredded cheddar to make my life easier)
  • I put in a bit of thyme and oregano**

044** The original recipe noted something called “pizza dough flavor” and adding 1 tablespoon of it to the dry ingredients.  I did google it later, but in the moment when I didn’t have it and didn’t really want to think to hard on it, I improvised.  When I think of pizza dough flavor, I was thinking herbs so I added in the thyme and oregano just by eye.  I’m guessing it was less than half a teaspoon of each.  I think my choice was delicious, but it would have been fine to leave out the herbs AND not add pizza dough flavor.

In the bowl of dry ingredients, I made a little well.  To this I added the wet ingredients:

  • The slightly cooled onion/garlic mixture
  • 2 large eggs, slightly mixed
  • 1 1/4 c. milk, straight from the carton and the fridge

I suppose things would have worked just a bit better to heat the milk a little or to let it come a bit to room temperature, but the recipe didn’t note that and I was curious to see what would happen.

026 027

And then you mix.  It’s very lumpy and gets pretty thick.  The recipe says to beat well for 2-3 minutes.  I’m guessing I gave it a good stir for about a minute.  It’s just too thick and heavy to do much more mixing by hand.  It’s possible the extra mixing would produce a slightly smoother loaf (a bit of “kneading” in a no-knead bread), but I was happy with my dough’s look.

028Here’s the best part.  No shaping.  You just scoop all of the batter into a pan that has been sprayed with a bit of oil.  The idea is then to let the batter rise in the pan in which it will bake.  In the recipe, the process of rising is estimated at 1 1/2 to 2 hours.  In about an hour, my bread had not done much rising.  I heated my oven just slightly, turned it off and put the loaf into the oven to rise.  When it was almost to the top of the pan (a bit over 2 hours for me), I took it out to preheat the oven to 400 degrees.

045I baked the bread for just 40 minutes but the recipe says 40-50 minutes.  I think it really depends on your oven.  My bread top wasn’t super brown but the sides and bottom of the loaf were brown.  I did a check at 20 minutes just to make sure the top wasn’t burning and tented it with foil as directed in the recipe to keep the top from over browning.

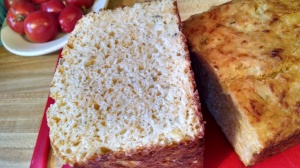
I let the full loaf cool once out of the pan (about 10 minutes of rest from the oven).  It’s a lovely, golden color.  The cheese flavor is present but not overly so and it toasts up 040very nicely.  The quick bread-like top as it goes into the oven leaves a bit of a craggy surface for texture and crunch.  The yeast makes for a firmer bread slice — unlike a quick bread, you can slice pretty thin slices which still hold up in a toaster.

I wonder if this technique might be applied to other quick breads to produce a yeast bread version.  A pumpkin bread, for example, that could hold up to a toaster would be delightful.

047 049

True to form, most of this bread has been eaten as toast.  With butter and honey, the sweet is a nice complement to the cheese and herbs of the bread.  I made the loaf about 2 weeks ago.  I ate half that week and put the other half in the freezer for later.  Later 090turned out to be today.  I started eating on the second half today for breakfast.  Toasted cheese bread, butter, and honey.  Or toasted bread, cream cheese and fresh tomato.  My versions of heaven!